
 RSS feed
Cubemaps are used heavily in games and other computer graphics applications. There are endless rendering techniques employing them for background imagery, reflections, and lighting. You can make a cubemap purely in software by rendering six different views from one viewpoint. This can be done in a modeling program, such as Blender or 3ds Max, or in real-time during a game’s execution. Alternatively, you can make a cubemap by combining photos that view every possible direction from one point in space.
What follows is a recipe for combining photos to make a cubemap. I did all this work in Linux, but it is performed with free software that you can also find on Windows and OS X. So if you aren’t a Linux user you may still be able to adapt this recipe to your choice of platform.
The incredibly short version: Take overlapping pictures in every direction from one point. Use Hugin to stitch them together into a 360×180-degree equirectangular panorama (imagine the surface of a globe flattened out into a rectangle). Use PanoTools to convert the panorama to a cubemap.
There may be smartphone apps or other software that can stitch 360×180-degree equirectangular panoramas like the one shown in Step 4. However, I haven’t found any that can match the quality of Hugin. If you can produce such an image that you are satisfied with, you can skip to Step 6.
1. Install software
Install Hugin and PanoTools. Hugin is an outstanding program for stitching images together to form panoramas, and it has a powerful graphical user interface. PanoTools is a collection of programs that aid the creation of panoramas. I’m continually amazed by some of the free software out there.
On Fedora:
> yum install hugin

> yum install panotools
On Ubuntu:
> sudo apt-get install hugin

> sudo cpan

> install Panotools::Script

> quit
<soapbox> For any non-Linux users reading this, take note of how easy it is to install free software on Linux. No downloading installers, and no unchecking boxes that try to covertly install spyware on your computer. One of my favorite aspects of Linux is how easy it is to explore a new concept. You can go online to read about the top five tools for a particular task, and then you can quickly install them all to try them out. You can find a lot of good software in the default Linux repositories. In this case, however, PanoTools is more exotic and I had to get it from CPAN on Ubuntu. </soapbox>
2. Collect images
You will need a digital camera for gathering images. Your images should cover absolutely everything you can see from one location, and they should overlap so that the software described in the next section can find similar points on each image and stitch them together. A good rule-of-thumb for the amount of overlap is about one third the image width.
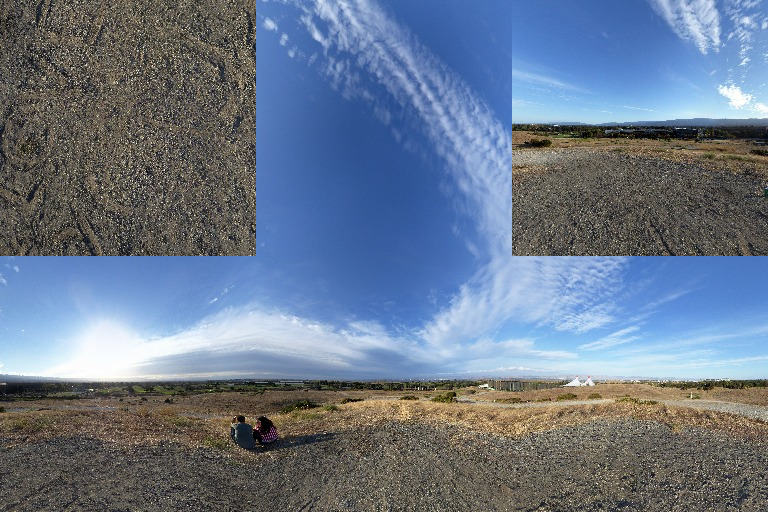
The camera I use has a pretty wide-angle lens (24mm equivalent), so about thirty images is usually enough. If you have a narrower field of view, you will probably need more images. A tripod helps a lot to control the yaw and pitch of your camera as you work your way through all the capturing.
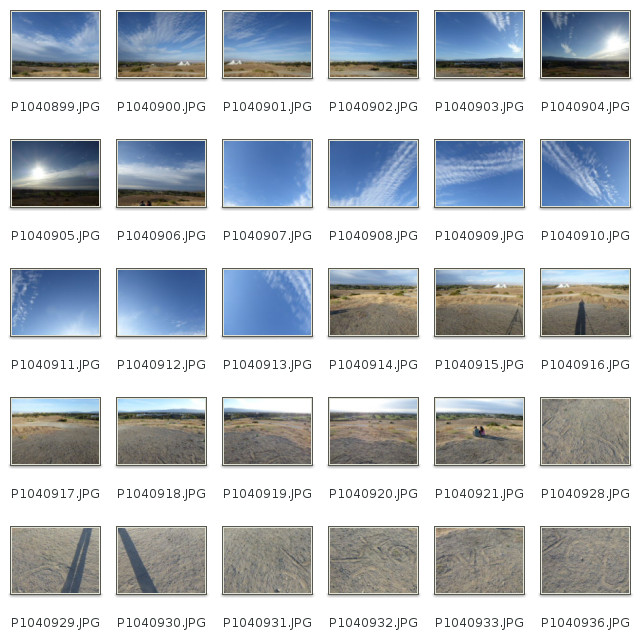
As you can deduce from the thumbnails above, I took four rings of images at four different pitches and one image straight up and one straight down.
The sky can be a problem because, if there aren’t enough clouds, you and Hugin will not be able to understand where you images overlap. It’s not impossible to stitch images of a cloudless sky, but you will need to specify control points when Hugin cannot choose them automatically, and they will be hard to choose even for a human. Remembering which way you were pointing the camera for each image will help a lot in this scenario, and following a consistent pattern when you gather images will help you remember.
Even when there are plenty of clouds in the sky, you can have problems because clouds constantly move and change shape. The slower the clouds are moving and the faster you collect your images, the easier it will be for Hugin to figure out where your images overlap.
3. Stitch images with Hugin
This is the most involved step. Hugin is wonderful, but, like any meaty program, it will require some patience and practice if you want to be proficient at it. Rather than repeat all the minutia that you can find in other (better) Hugin tutorials, here is the short version of what you need to do to make a cubemap (or other panoramic images, for that matter).
3a. Load and align images
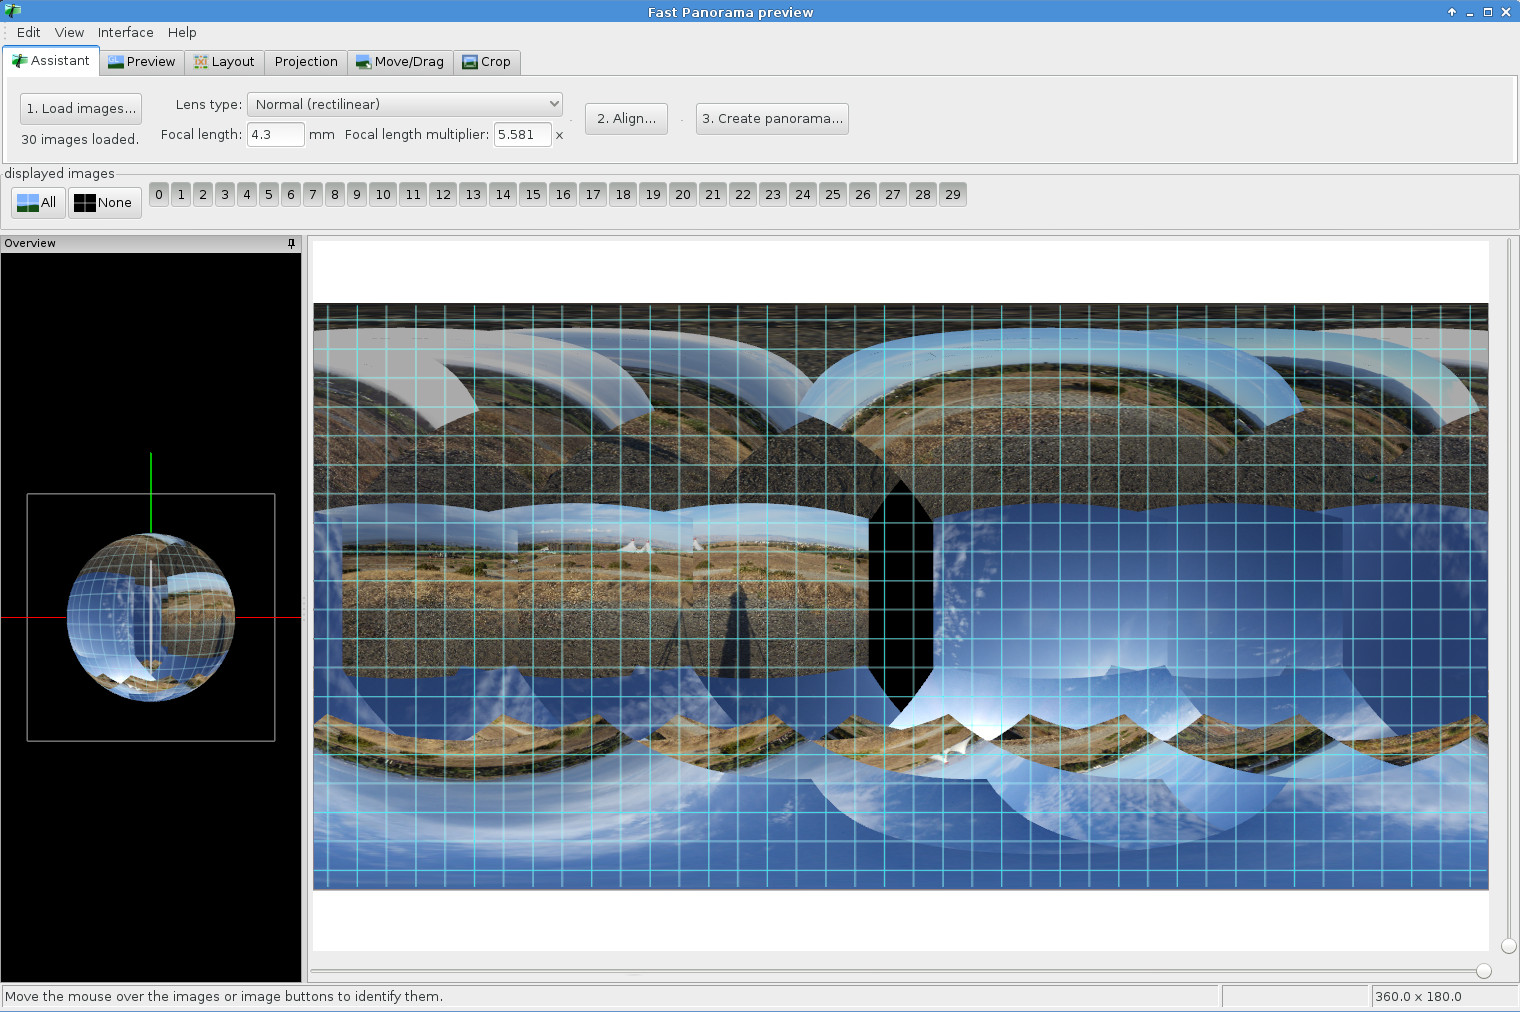
After starting Hugin, press the “Load images…” button and select all your images. You should see the main graphical view fill up with your images, possibly positioned and warped into Hugin’s best initial guess at how they should be arranged for a panorama.
Next, press the “Align…” button. Hugin will now take some time to search for control points (points that match between pairs of images). By the end of this step, you should see something like this:
3b. Add control points
The source images I used gave me a little trouble for both of the usual reasons: there were not enough clouds in the sky and the clouds changed too much over the duration of my capturing. For these reasons, Hugin popped up a window with the following message:
Warning 3 unconnected image groups found:[0, 1, 2, 3, 4, 5, 6, 7, 15, 16, 17, 18, 19, 20, 21, 22, 23, 24, 25, 26, 27, 28, 29], [8, 9, 10, 11, 12, 14], [13]

Please create control points between unconnected images using the Control Points tab.
After adding the points, press the "Align" button again
If this happens, do as instructed and find Hugin’s Panorama Stitcher window where you can add control points of your own (Hugin will probably open this window automatically for you).
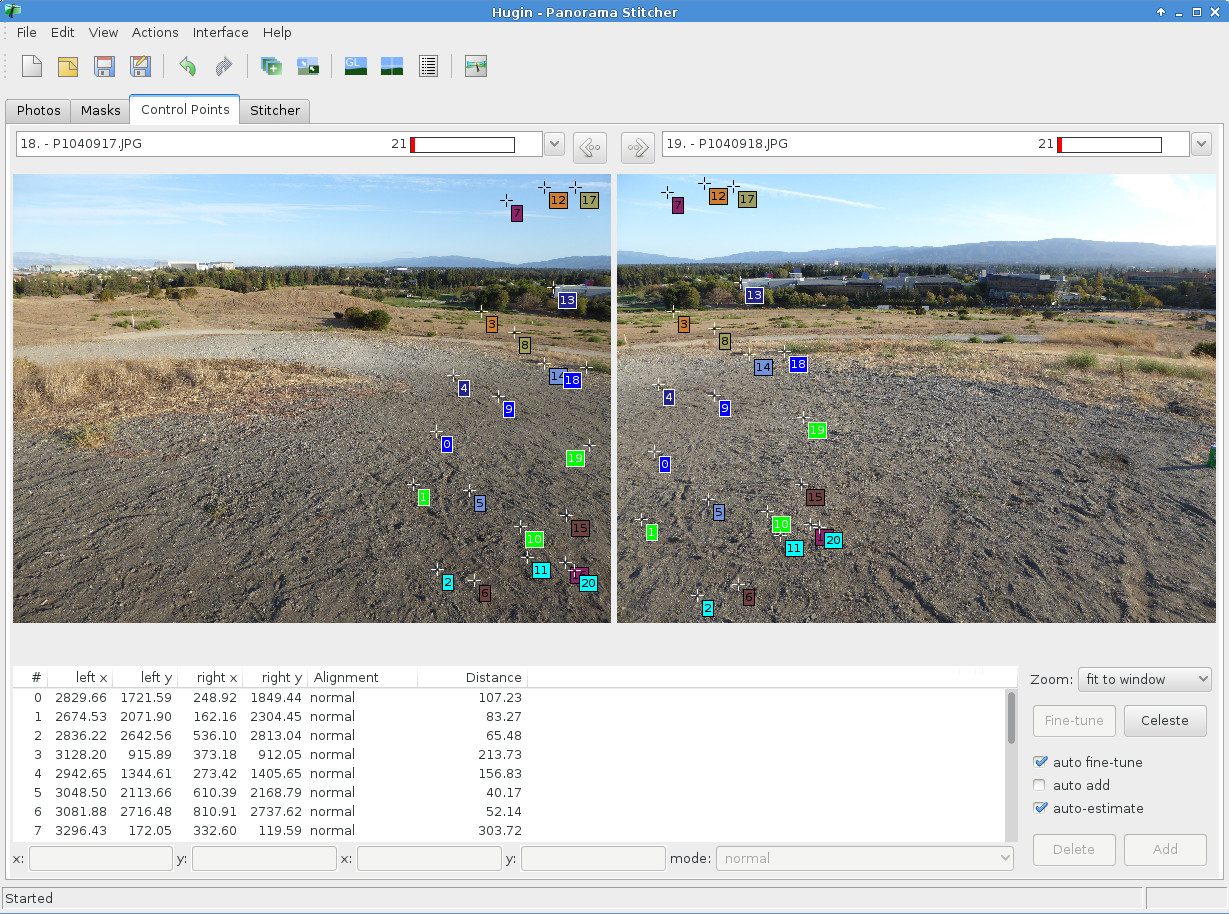
Manually adding control points is the most time-consuming part of stitching images, but it is often necessary. Once you think you have enough control points between all adjacent pairs of images (three or four is usually enough), press the “Align…” button again. You might need to repeat this process to get things aligned well enough.
And don’t forget to save your work occasionally.
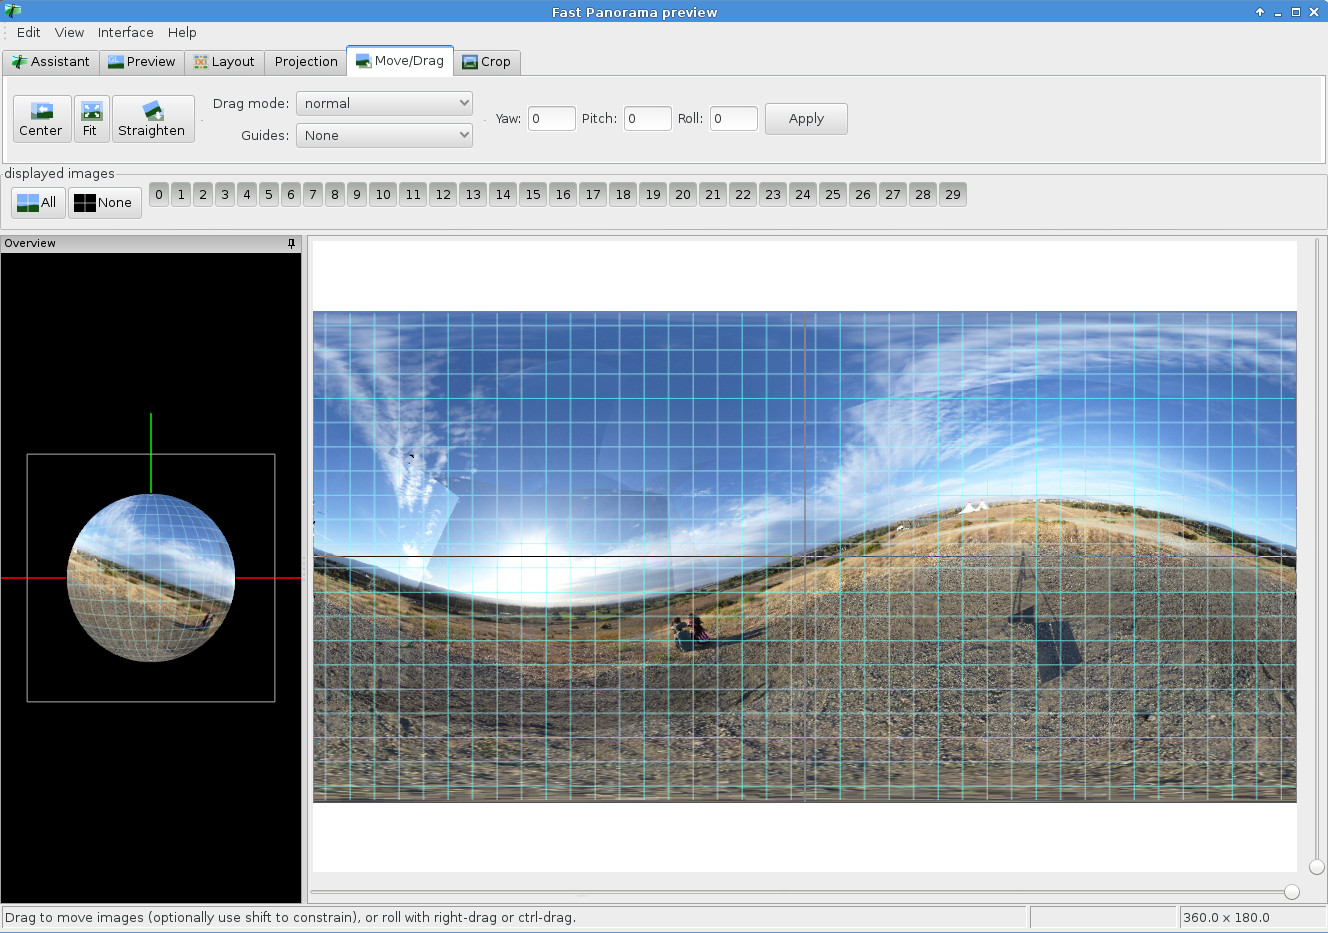
3c. Align your horizon
Once you get Hugin to stop complaining about unconnected image groups, go back to the Fast Panorama preview window and select the Move/Drag tab. By dragging the main image different ways, you should be able to get your horizon line to go straight across the image. Here is what you will see when your horizon is NOT lined up properly:
3d. Stitch
Go back to the Panorama Stitcher window and select the Stitcher tab. The important settings here are “Projection” = Equirectangular and “Field of View” = 360 x 180. If you have prepared enough images and connected them with enough control points, Hugin will already have these settings figured out.
To make a high-resolution cubemap, say, 1024x1024x1024, you need to start with an equirectangular projection with enough resolution. 6000×3000 is plenty, so you can set the Canvas Size accordingly. It is good to not go overboard on these numbers. Hugin can easily produce gigantic images that consume a lot of hard drive space and are slow to edit.
Once you have everything set the way you like, press “Stitch!”
4. Edit the equirectangular image
If all goes well, Hugin will produce a stunning panorama of your scene, complete with severe warping at the top and bottom of the image. You will probably want to remove shadows of yourself and your tripod and maybe tweak the colors, so load the panorama into your favorite image editing program, such as GIMP or Photoshop. It is difficult to edit anything at the extreme top or bottom of this image because it is so warped. Instead, you might want to wait on those parts and edit the top and bottom cubemap images. When finished, you should have something like this:
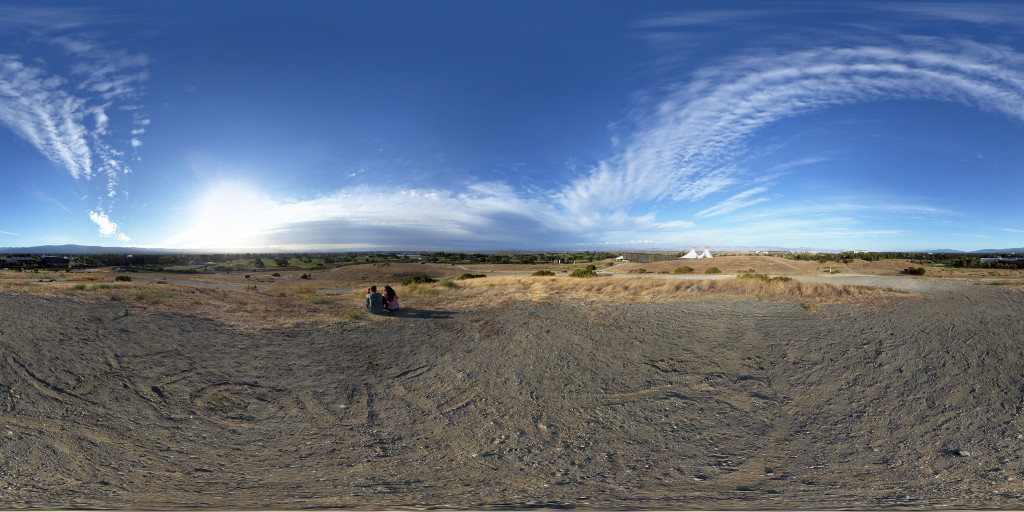
Look closely and you can see that someone wrote “I LOVE YOU” on the ground with his shoe. Isn’t that cute?
5. Panini (optional)
This step is just for fun, so you can skip it if you want. Panini is an image viewer that can load your equirectangular projection. It wraps the image around your eyepoint and allows you to look in any direction.
On Fedora:
> yum install Panini
I haven’t found an easy way to install it on Ubuntu yet. Please tell me in the comments if you know of one.
6. Convert equirectangular panorama to cubemap
Finally we make the actual cubemap. It would be convenient if Hugin could produce cubemap images for us, but it doesn’t have built-in functionality for that. Maybe it will someday.
Instead, we use PanoTools’s erect2cubic script to create a PTO file describing cubemap parameters and feed that file to Nona so it can create the cubemap. Nona is a stitching program that is installed along with Hugin. You’ll want to do something like this:
> erect2cubic --erect=yourpanorama.tif --ptofile=xxx.pto --face=256

> nona -o xxx xxx.pto
You can replace the xxx parts with another name if you like. To make my life easier, I made the following script that produces only the final cubemap images and nothing else. (This script also uses convert, which you can get by installing ImageMagick.)
#!/bin/sh
# check if called properly
if [ $# != 2 ]
then
echo "Usage: $0
echo "This script converts a 360x180-degree equirectangular panorama to a cubemap. Each image is named starting with
exit 0
fi
# save command line args in variables
panorama=$1
prefix=$2
# create .pto file
erect2cubic --erect=${panorama} --ptofile=${prefix}.pto --face=1024
# convert panorama to cubemap faces
nona -o ${prefix} ${prefix}.pto
# convert and rename cubemaps so they are named more descriptively for OpenGL
convert ${prefix}0000.tif ${prefix}_posz.jpg
convert ${prefix}0001.tif ${prefix}_posx.jpg
convert ${prefix}0002.tif ${prefix}_negz.jpg
convert ${prefix}0003.tif ${prefix}_negx.jpg
convert ${prefix}0004.tif ${prefix}_negy.jpg
convert ${prefix}0005.tif ${prefix}_posy.jpg
# remove intermediate files
rm ${prefix}.pto
rm ${prefix}0*.tif
After you use erect2cubic and nona you should end up with your six final cubemap images.
You might see some pinching at the center of the top and bottom images, but it has been really subtle in my cubemaps. You can easily fix it with GIMP.
Wrap-up
If you want to get fancy, Hugin will also do exposure fusion, which I mentioned in a previous blog entry. Next time I make a cubemap I want to try taking multiple exposures of each image and fusing them so the dark areas are brighter and the sun is actually visible instead of appearing as a giant over-saturated glob of white in the sky.
That’s all. Have fun making cubemaps with free software.